Dark circles happen to the best of us. Whether it’s the lack of sleep, genetics or allergies, we all want to make them disappear… ASAP. Today I will show you how to do it.
Step 1 – COLOR CORRECT AND CONCEAL
First, a little bit of color theory. This is a color wheel. Trust me, from now on it will be your best friend. Once you understand how colors work, you will be more aware of how you can not only cover your undereyes but also make your eyes pop with eyeshadows.
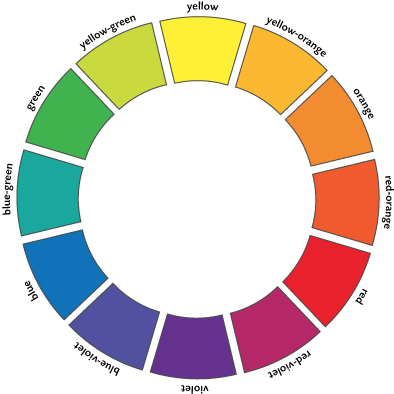
Colors directly opposite each other on the color wheel, such as red and green or blue and orange, complement each other. When mixed, these colors cancel each other out and create a neutral shade. This is exactly what we want to achieve for our undereyes. We want to CANCEL OUT the dark apperance.
Dark circles tend to be blue or gray in color. To conceal them, you need to apply a color that’s opposite on the color wheel, which would be peach or orange/red. For fair skin, choose a light to medium peach color. For medium to dark skin, pick an orange or red color.
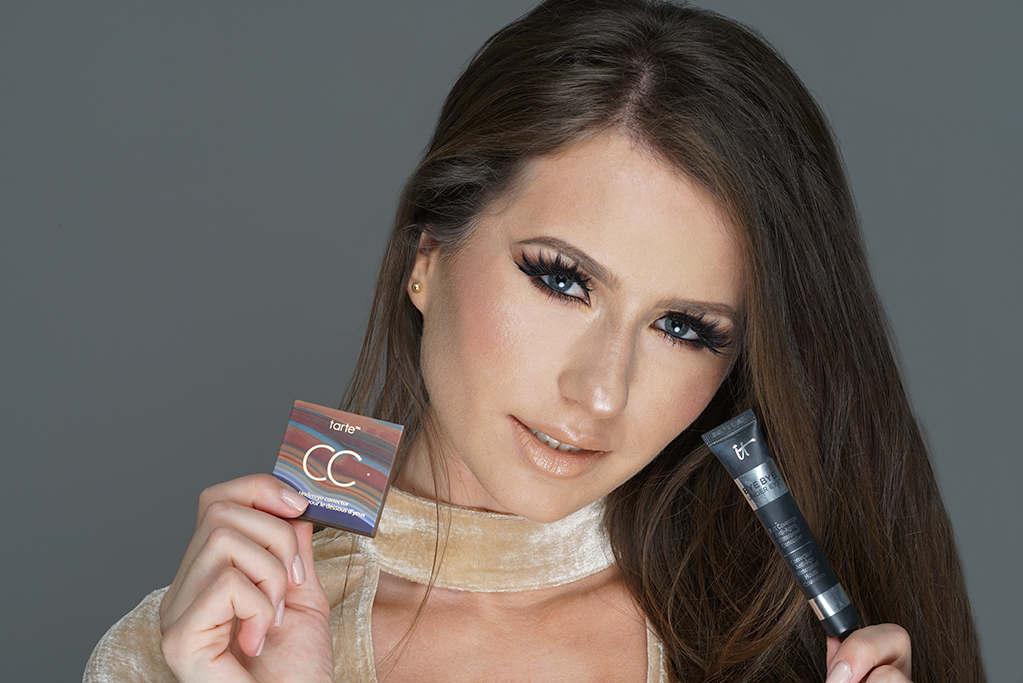
I’ve recently received a sample of Tarte Cosmetics’ Colored Clay CC Undereye Corrector with my order and I was sold! I ordered the full size product the next day. This product is a GAME-CHANGER for me. I use it in color light-medium. It has just the perfect peachy color that diminishes the appearance of under eye circles. It gives full coverage and creates a flawless complexion. It also has light-diffusing particles that brighten the skin and offers nutrient-rich properties.
I apply it with my Real Techniques Doomed Shadow brush in the areas where I see the discoloration. I then blend it out with my Beauty Blender.
Step 2 – HIGHLIGHT
To brighten up your under eyes even more and create a great highlight, I follow with my It Cosmetics Bye Bye Undereye Concealer in color light. This concealer is GREAT enough to be used as a stand alone undereye concealer but I like to add that extra step I described above to help eliminate ANY dark circles. But you can totally get away with them just by using this product. I would suggest ordering one in color medium in this case.
For a highlighter, choose a color that is one shade lighter than your skin tone so it brightens the under eye area. Place a couple dots under your eye and down to your nose to create a triangle and blend it out with a soft dome brush. Follow with a beauty blender.
Step 3 – SET
To avoid creasing and caking, set the area with a loose setting powder. I use Laura Mercier Transculet Loose Powder and I swear by it. If you have dry skin, apply a very small amount just to set everything up. If you like using face powder a lot and your skin is thick and oily, you can apply a thin layer of the powder and let it sit for 2-3 minutes and then brush the excess product off. I apply it with my Real Techniques brush.
I hope this helps you solve your battle with your dark circles. Although this may seem like a long process, it takes less than a minute and the results are so worth it! I did a quick video underneath to show you how I do it.
Thanks for reading and watching!
Xoxo,
Kat
PRODUCTS I USE:
QUICK VIDEO TUTORIAL:
Song: PremiumBeat Taking Off

5 Comments
Kat!! How did I not know you had a blog?! I love this post, I suffer from dark circles and I’m always on the hunt for new products to try out. Thanks for sharing!!
xo-Nina
http://www.ninalnguyen.com/
Hi Nina! Thanks so much for stopping by and reading! I only recently created this blog so probably that’s why 🙂 Anyway, I’m so excited that you liked this post! xoxo
Dzieki 🙂 pomocne akurat szukam nowych kosmetyków pod oczy 🙂 pozdrawiam 🙂
Super, ciesze sie bardzo! Dzieki za wpadniecie i przeczytanie. Mam nadzieje ze u was wszystko super. Pozdrowienia 😉
Akurat chorujemy :/ ale dzięki. Pozdrawiam 🙂