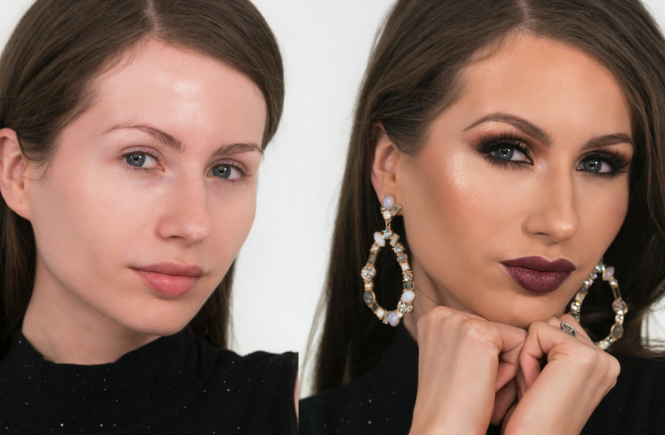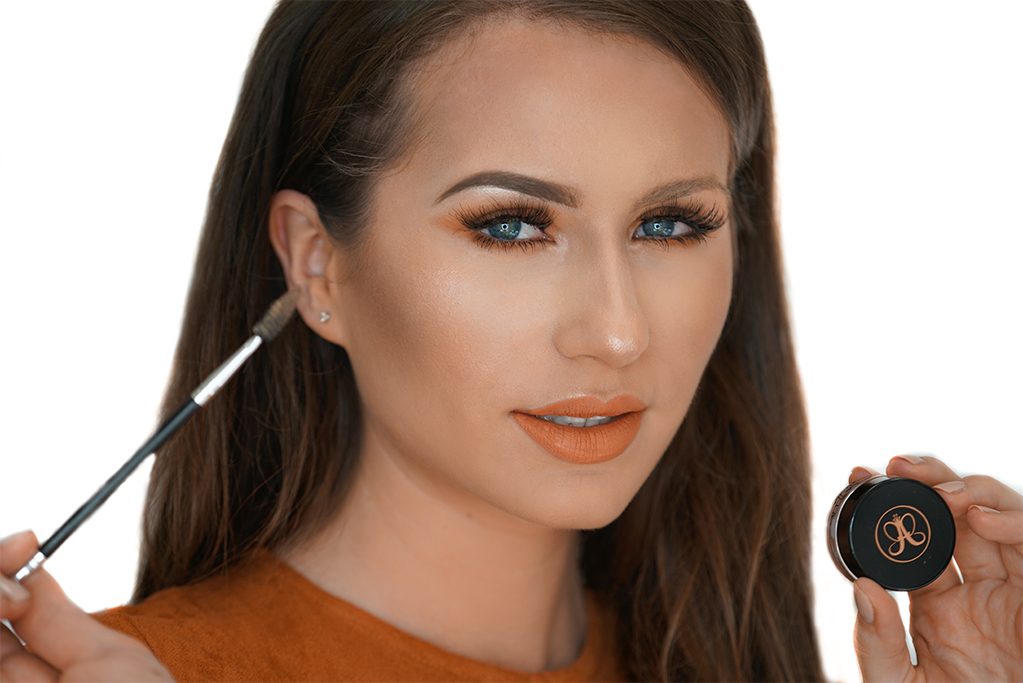
We all have seen what a good frame can do to a painting. It’s the same thing with your eyebrows: they form a frame for your face and eyes. Beautifully shaped and filled eyebrows can make a HUGE difference (and take years off 🙂 ). Just have a quick look at my picture above where one of my eyebrows is already done and the other one is not to immediately notice the difference. So if you’re interested in how you can improve your eyebrow game and shape your eyebrows, keep on reading!
All brows look better with added shape and definition. While you can sometimes get away with not having your eyebrows done when you wear little makeup, it’s almost impossible to pull off a more dramatic eye makeup without nicely defined brows. You need that frame to hold your eye makeup and create a beautiful whole.
My favorite shape of the eyebrow is slightly squared off at the very beginning and tapered to a fine (but not overly extended) point at the very end with a nice arch in between.
How to do it:
- Choose color that matches your eyebrows and hair. I use Anastasia Beverly Hill’s dip brow in color soft brow. It’s a creamy, smudge-free formula that glides on skin and hair smoothly and provides great color, sculpture and shading. I did mention this before that this formula requires a more precise hand so if you are a beginner, I’d recommend using their duo powder as it gives you more control and manageability. What’s great about this powder duo is that it comes with two shades per compact so you can easily use both if you can’t seem to find the right shade for you. I would start with the lighter shade at the beginning of the brow and slowly transition with a darker one. You will also need an angled brush to line the product and I use one from Anastasia as well. Anastasia Beverly Hills is called the queen of the eyebrows so I would definitely recommend trying her brow products. The quality is amazing!
- Measure your brows. The start of your brow should normally follow an imaginary line drawn from the outer edge of the nose to the inside corner of the eye. You can place your angled brush straight up to do so. Next, move the brush so it aligns with the outer edge of the iris (the colored portion of the eye). This is normally where the highest point of your brow should be. Then, place the brush diagonally from the edge of your nostril to the outer corner of the eye – this determines the minimum length of the outer taper of the brow.
- Draw and fill in the brows. Don’t start at the very beginning to line your eyebrows with the product – you might put too much pigment and the brows would look too strong and sharp at the corners, which might make you look as if you’re frowning. I like to start at about 1/3 of the eyebrow length and then I come back to the beginning of my eyebrow when the brush has little product left. The goal is to create an ombre effect. I also brush my eyebrows every now and then as this helps with even product distribution and unruly hairs. If your eyebrow hairs are super unruly though (mine are not) you might want to use a transparent brow gel (like the one from NYX Cosmetics or Anastasia Beverly Hills) to tame them at the very end.
- Highlight and define with a concealer. I use the same It Cosmetics concealer in color light that I use to highlight and brighten my undereyes to line the area just below and above the brows to create contrast. It also helps lift the eyebrows and define them even more.
- Blend with a beauty blender. You want to blend the area above and below your brows with a beauty sponge to make sure the concealer blends well with your foundation.
I know it might sound too complicated at first so I also did a quick video to show you how I do it. You can watch it below. I hope you liked this tutorial and if you have any questions, leave them in the comments below.
Xoxo,
Kat
Products I use:
Quick video tutorial:
Song: Kellee Maize Remix 2